
Deployments
Deploy your MCP server from GitHub or a .zip file
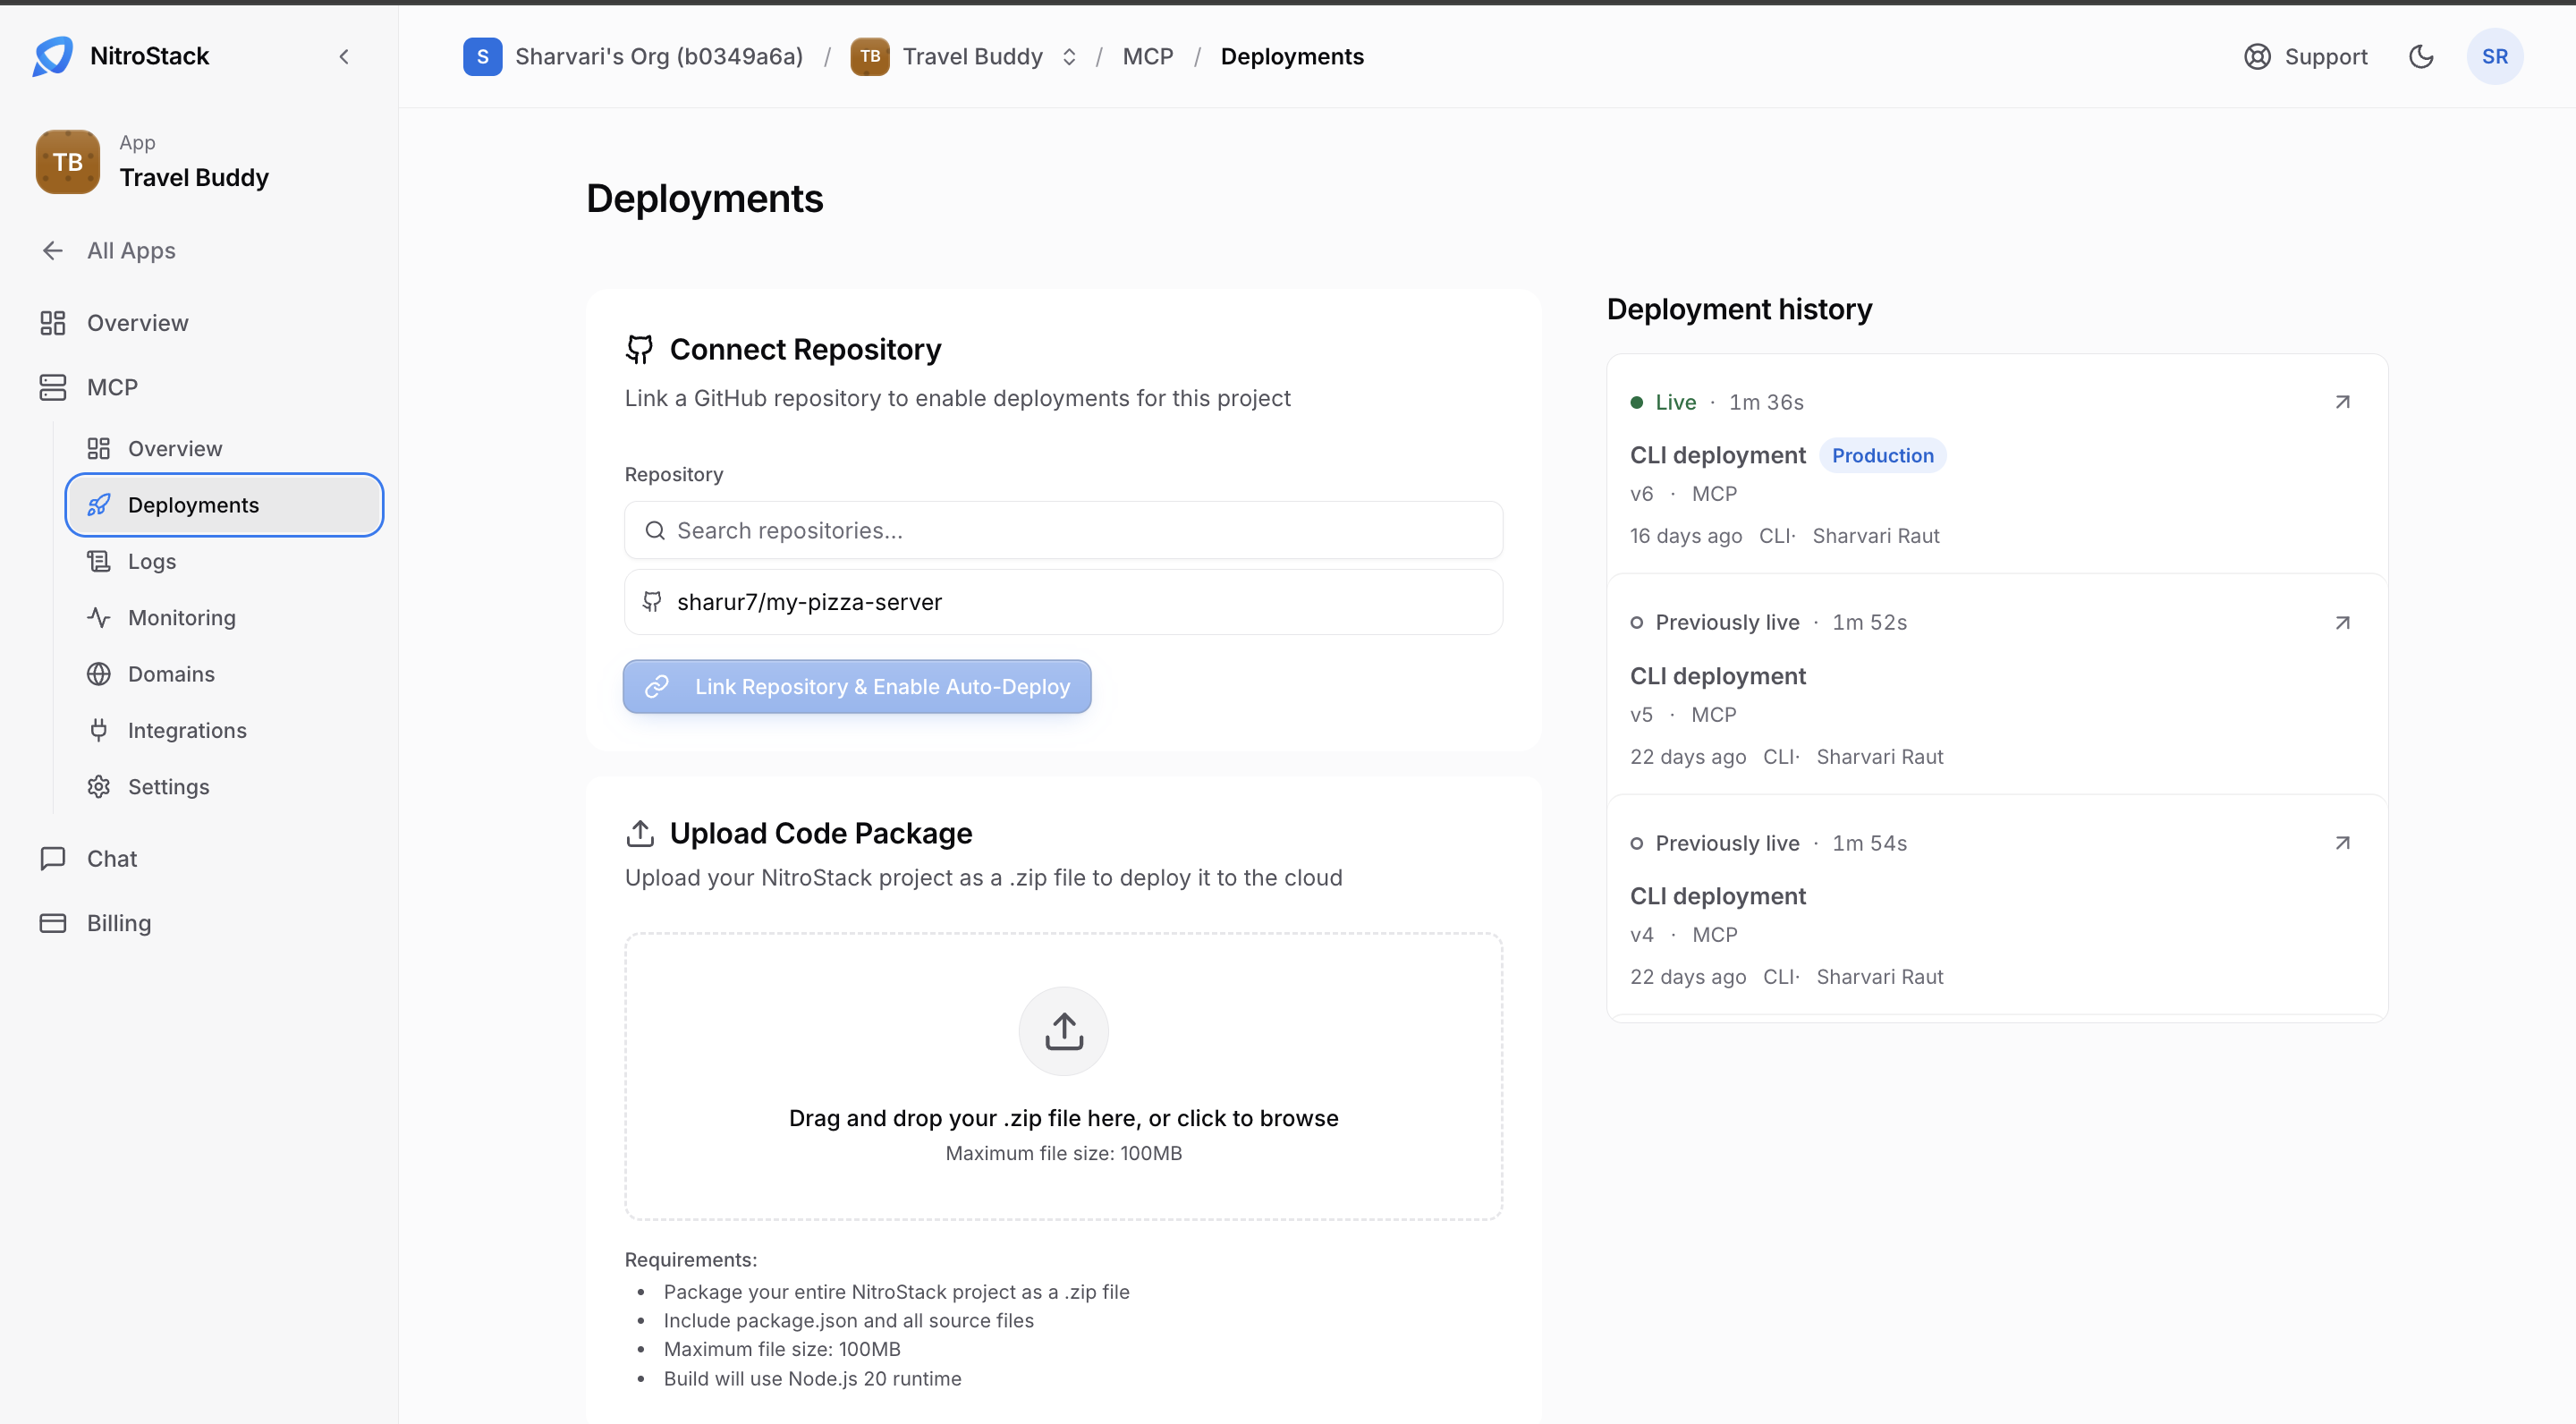
Deployments, in the app's MCP menu, is where you ship your server. You can connect a GitHub repository, so every push deploys, or upload your project as a .zip file.
Deploy from GitHub
Install the GitHub App
Your organization needs the NitroStack GitHub App. Install it once from Integrations.
Pick a repository
Under Connect Repository, search for the repository and select it.
Link it
Click Link Repository & Enable Auto-Deploy. NitroCloud deploys the repository, and deploys again on every push.
You can also deploy a linked project straight from NitroStudio.
Upload a .zip file
Under Upload Code Package, drag your project's .zip file onto the drop area, or click it to choose the file. The package must:
- contain your whole NitroStack project, including
package.jsonand all source files - be 100 MB or smaller
TypeScript projects build on the Node.js 20 runtime. nitrostack-cli pack creates a clean archive without node_modules, build output, or .env files.
Python projects
NitroCloud recognizes a Python app when nitrostack is a dependency in pyproject.toml or requirements.txt, or the code imports it. The same packaging rules apply: the archive holds the project root (or the project one folder down), and it's 100 MB or smaller.
The container runs python main.py, with HOST=0.0.0.0, PORT=3000, and MCP_TRANSPORT_TYPE=http already set. You don't need a Dockerfile, and a uv.lock in the archive is used when present. Python builds don't use npm start.
Before you upload, check the project locally:
nitrostack-py validate
MCP_TRANSPORT_TYPE=http nitrostack-py start
See Prepare your project for the full checklist of files.
Start command
NitroCloud detects how your app starts from your code, and shows Auto-detected when it has. If detection fails, click Add Start Command and enter it yourself.
Environment variables
Add your secrets and settings under Environment variables: click Add Variable for one, or Bulk Edit to paste several. Values are encrypted, and they apply to the next deployment, so deploy again after you change them.
Keep secrets here, never in your code or in a committed .env file.
Deployment history
Deployment history lists every deployment, newest first. The one serving traffic is marked Live, with a Production badge; earlier ones are marked Previously live. Each entry shows its version (v6, v5, and so on), how long the build took, how it was deployed, such as a CLI deployment, and when and by whom.
Deployment details
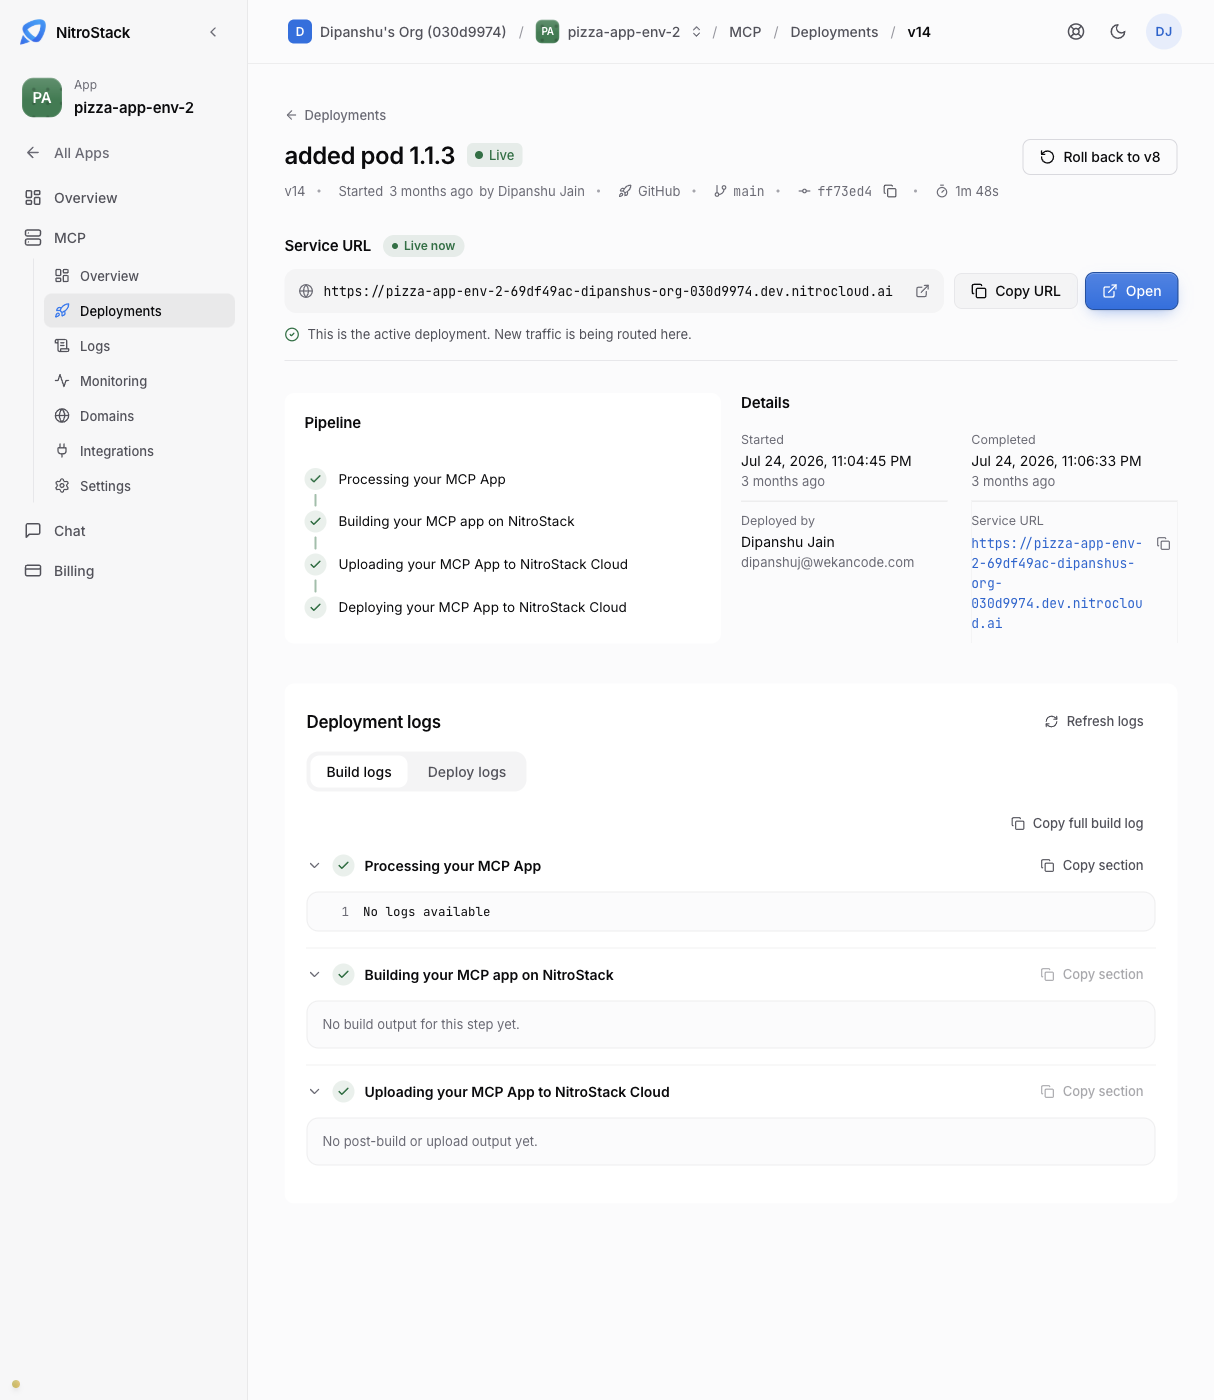
The arrow on an entry opens that deployment. Its page shows:
- the version, its status (Live, Previously live, or failed), who deployed it, and when
- where it came from: a GitHub push, a
.zipupload, or NitroStudio - the build log
- the environment variables applied to that build, with their values masked
When a deployment fails
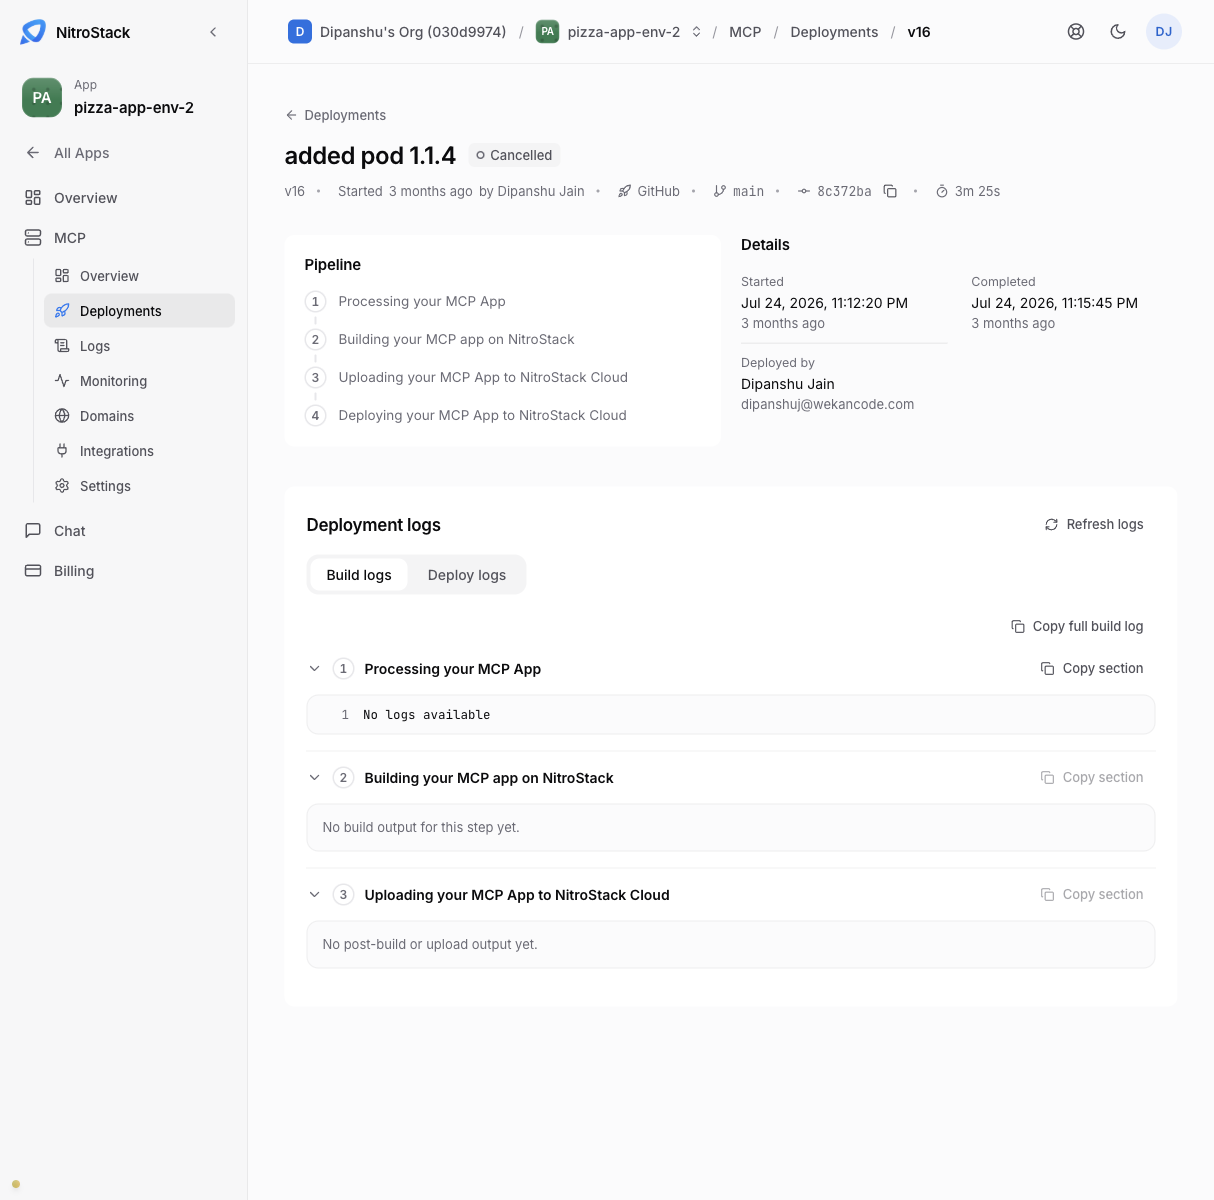
A failed deployment stays in Deployment history and never becomes Live. The previous live deployment keeps serving traffic, so a bad build doesn't take your server down.
Open the failed entry and read its build log.
- a missing entry file:
package.jsonfor TypeScript, ormain.pyfor Python - a start command that doesn't listen on port 3000
- an archive over 100 MB, often because it includes
node_modules
Fix the cause and deploy again. Changing an environment variable doesn't affect the running deployment either; add the variable, then deploy again.
Next steps
Monitoring
Check that the new version is healthy.
Integrations
Install the GitHub App for your organization.
Watch the video
Check out the video for a walkthrough of everything on this page.