NitroStudio Overview
Introduction
NitroStudio is a standalone visual testing environment for MCP servers. It provides a modern, feature-rich interface for developing, testing, and debugging your tools, resources, and widgets.
Note: NitroStudio is now a separate application from the NitroStack SDK. It connects to your NitroStack projects via MCP protocol.
Studio Interface
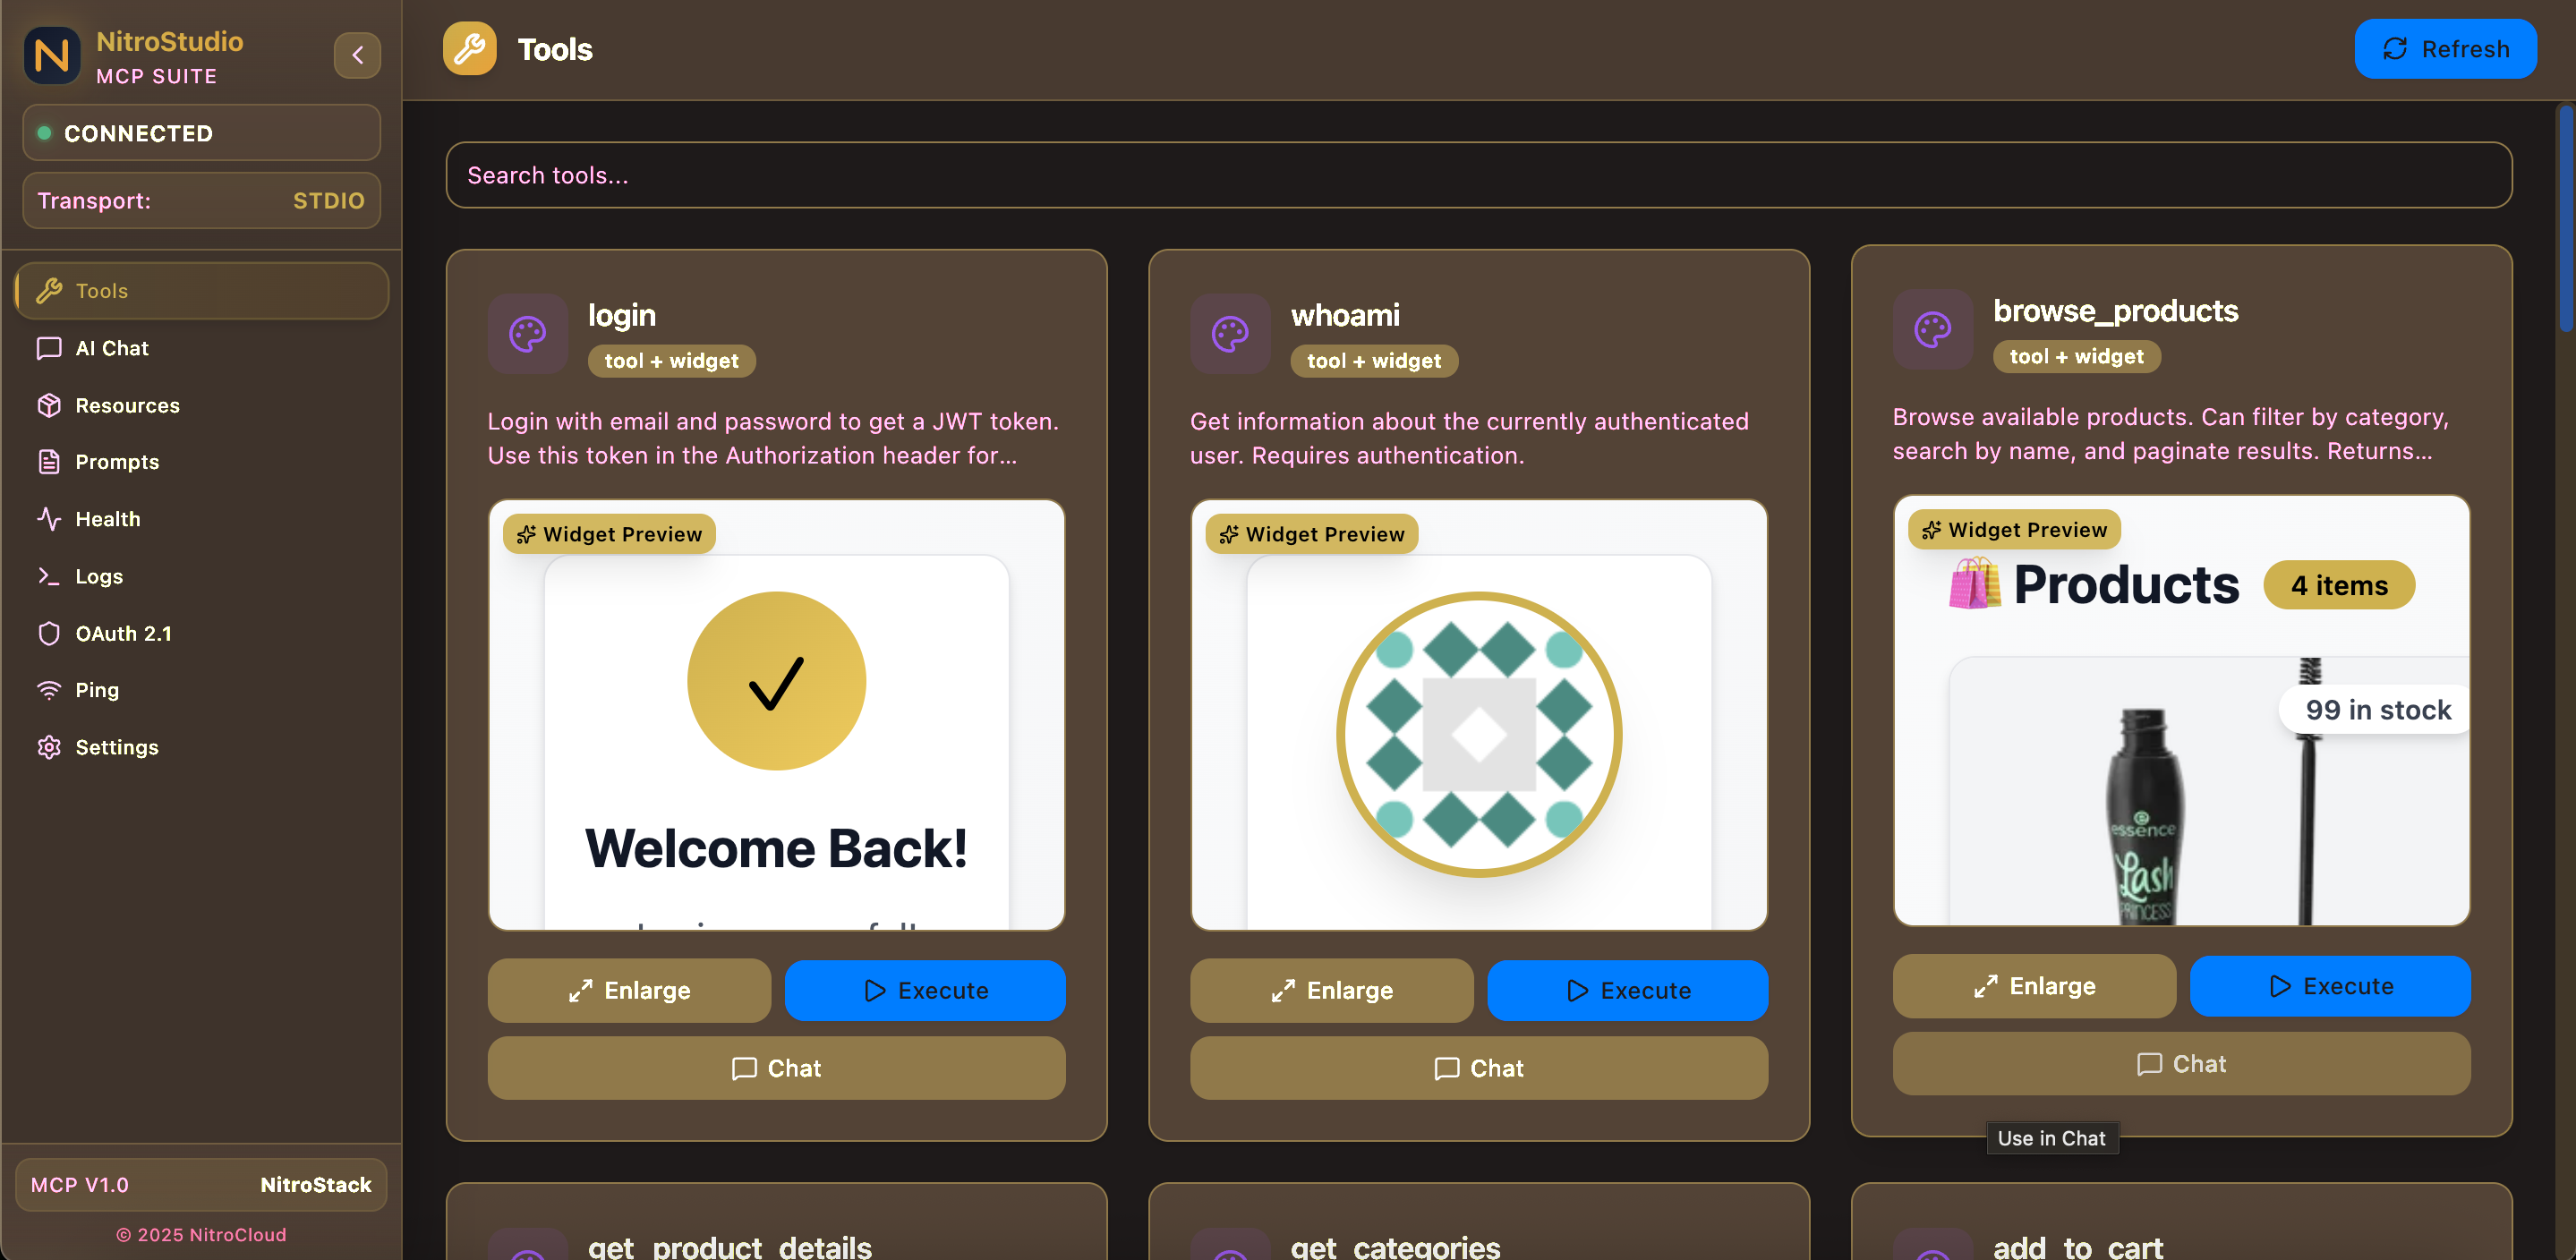
NitroStudio provides a comprehensive testing environment with AI chat integration, tool execution, and live widget preview.
Key Features
AI Chat Integration
Test your tools naturally by chatting with AI models:
- OpenAI GPT-4 - Industry-leading model with excellent tool calling
- Gemini 2.0 Flash - Fast, free model with 1M context
The AI automatically calls your tools and renders associated widgets in the chat interface.
Widget Preview
- Live widget rendering
- Enlarge for full-screen view
- Test with example data
- See widgets as users will see them
Manual Tool Testing
- Execute any tool
- Dynamic form generation from Zod schemas
- Input validation
- Response visualization
- Widget rendering with actual data
Resource Browser
- View all available resources
- Execute resource handlers
- Preview data
- Widget rendering if available
Real-time Logs
- View MCP server logs
- Filter by level (info, warn, error)
- Search and export logs
Architecture
NitroStudio connects to your NitroStack project externally:
┌─────────────────────────────────────────────────────────────────┐
│                      NitroStudio (Standalone)                    │
│                                                                  │
│  ┌─────────────┐  ┌─────────────┐  ┌─────────────┐              │
│  │    Chat     │  │   Tools     │  │   Logs      │              │
│  │  Interface  │  │   Panel     │  │   Viewer    │              │
│  └─────────────┘  └─────────────┘  └─────────────┘              │
│                           │                                      │
│                    ┌──────┴──────┐                              │
│                    │ MCP Client  │                              │
│                    └──────┬──────┘                              │
└───────────────────────────┼──────────────────────────────────────┘
                            │ stdio
                            │
┌───────────────────────────┼──────────────────────────────────────┐
│            NitroStack Project (Your Code)                        │
│                           │                                      │
│  ┌────────────────────────▼────────────────────────┐            │
│  │              MCP Server (stdio)                  │            │
│  └─────────────────────────────────────────────────┘            │
│                                                                  │
│  ┌─────────────────────────────────────────────────┐            │
│  │              Widget Server (port 3001)           │            │
│  └─────────────────────────────────────────────────┘            │
└──────────────────────────────────────────────────────────────────┘
Tech Stack
- Next.js 14 - App router, server components
- React 18 - UI framework
- TypeScript - Type safety
- Tailwind CSS - Styling
- Zustand - State management
- MCP SDK - Protocol communication
Getting Started
Step 1: Start Your NitroStack Project
cd your-project
npm run dev
This starts the MCP server and widget server (if present).
Step 2: Open NitroStudio
Launch NitroStudio (web app or desktop).
Step 3: Connect to Project
- Click Select Project or browse folders
- Navigate to your NitroStack project
- Click Connect
Studio will:
- Detect your NitroStack project
- Start the MCP server subprocess
- Connect to widget server
- Load tools, resources, and prompts
Step 4: Configure AI Provider
- Click settings icon
- Select OpenAI or Gemini
- Enter API key
- Start chatting!
Pages
Chat
The main interface for natural interaction:
- Select AI provider
- Enter API key
- Chat naturally
- Tools called automatically
- Widgets rendered inline
Example:
You: Show me products in Electronics

AI: [Calls browse_products tool]
    [Renders products-grid widget]
    Here are the electronics products available...
Tools
Manual tool testing:
- Browse available tools
- View tool descriptions
- Click Execute
- Fill dynamic form
- Submit
- View response
- See widget preview
Resources
Browse and test resources:
- View all resources
- See URIs and descriptions
- Execute resource handlers
- Preview data
Logs
Real-time server logs:
- View log entries
- Filter by level
- Search logs
- Export to file
Deployment Options
Web Application
Run Studio as a local web server:
git clone https://github.com/nitrostack/nitrostudio.git
cd nitrostudio
npm install
npm run dev
Desktop Application
Download pre-built apps (coming soon):
- macOS:
.dmg - Windows:
.exe - Linux:
.AppImage
Self-Hosted
Deploy to your infrastructure:
npm run build
npm start
See Standalone Setup for detailed instructions.
Configuration
Environment Variables
# API keys (optional, can set in UI)
OPENAI_API_KEY=sk-...
GEMINI_API_KEY=...
Theme System
Studio supports dark/light themes:
- Dark Theme: Black backgrounds with gold accents
- Light Theme: White backgrounds with dark text
- Persistence: Theme saved in
localStorage
Toggle with the theme button in the sidebar.
Security
- API keys stored in browser's
localStorage - Never sent to external servers
- Widgets sandboxed in iframes
- MCP communication is local only
Troubleshooting
Studio Not Connecting
- Ensure
npm run devis running in your project - Verify project has
nitrostackdependency - Check for compilation errors
Widgets Not Loading
- Check widget server:
curl http://localhost:3001 - Verify
src/widgets/package.jsonhas dependencies - Rebuild:
npm run widget install
AI Not Calling Tools
- Check API key is valid
- Ensure tools are properly decorated
- Try a specific prompt like "call the calculate tool"
See Standalone Setup for more troubleshooting.